Blazor を使って入力画面をつくることはできますが、データベースは別で用意してあげる必要があります。
「SQL 苦手なんだよな…」という人も安心してください。
実は Entity Framework を使うことで、SQL を使わずにデータベースの操作をすることができるんです。
本記事では、クラウド上に SQL Server を用意する手順と、Entity Framework で DB にアクセスする手順について解説しました。
この記事を読むことで、迷うことなく Entity Framework を導入することができるようになります。
では、さっそく見ていきましょう。
Azure SQL Database の準備
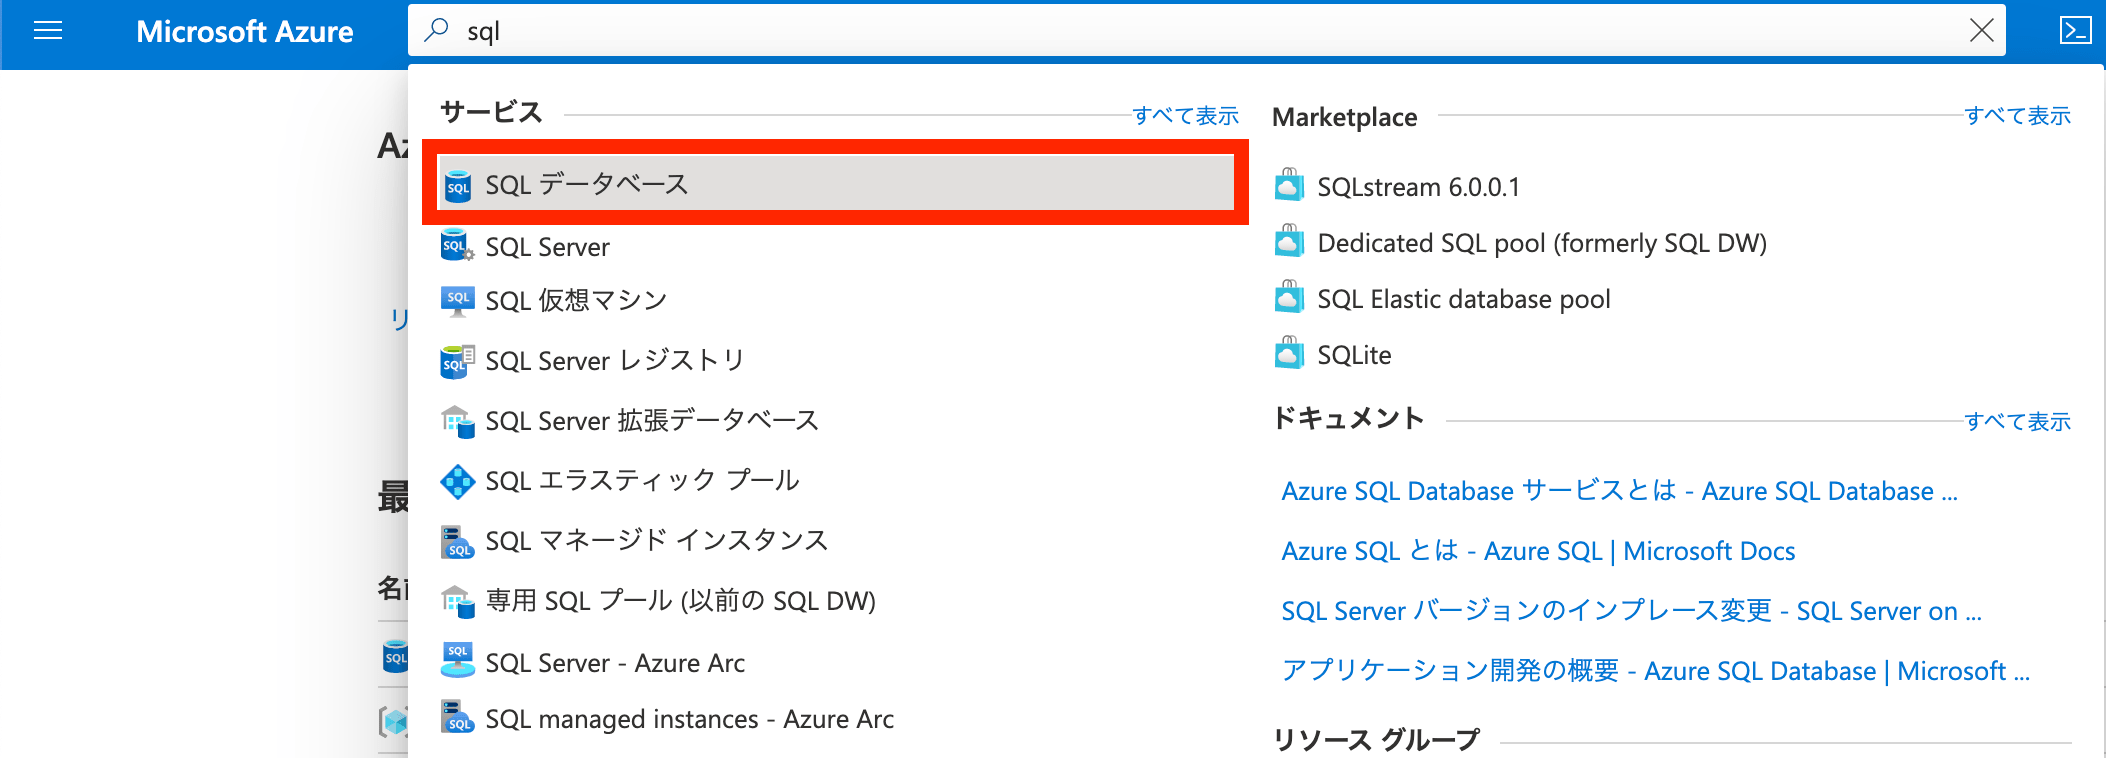
Azure ポータルに移動して、SQL データベースを選択してください。
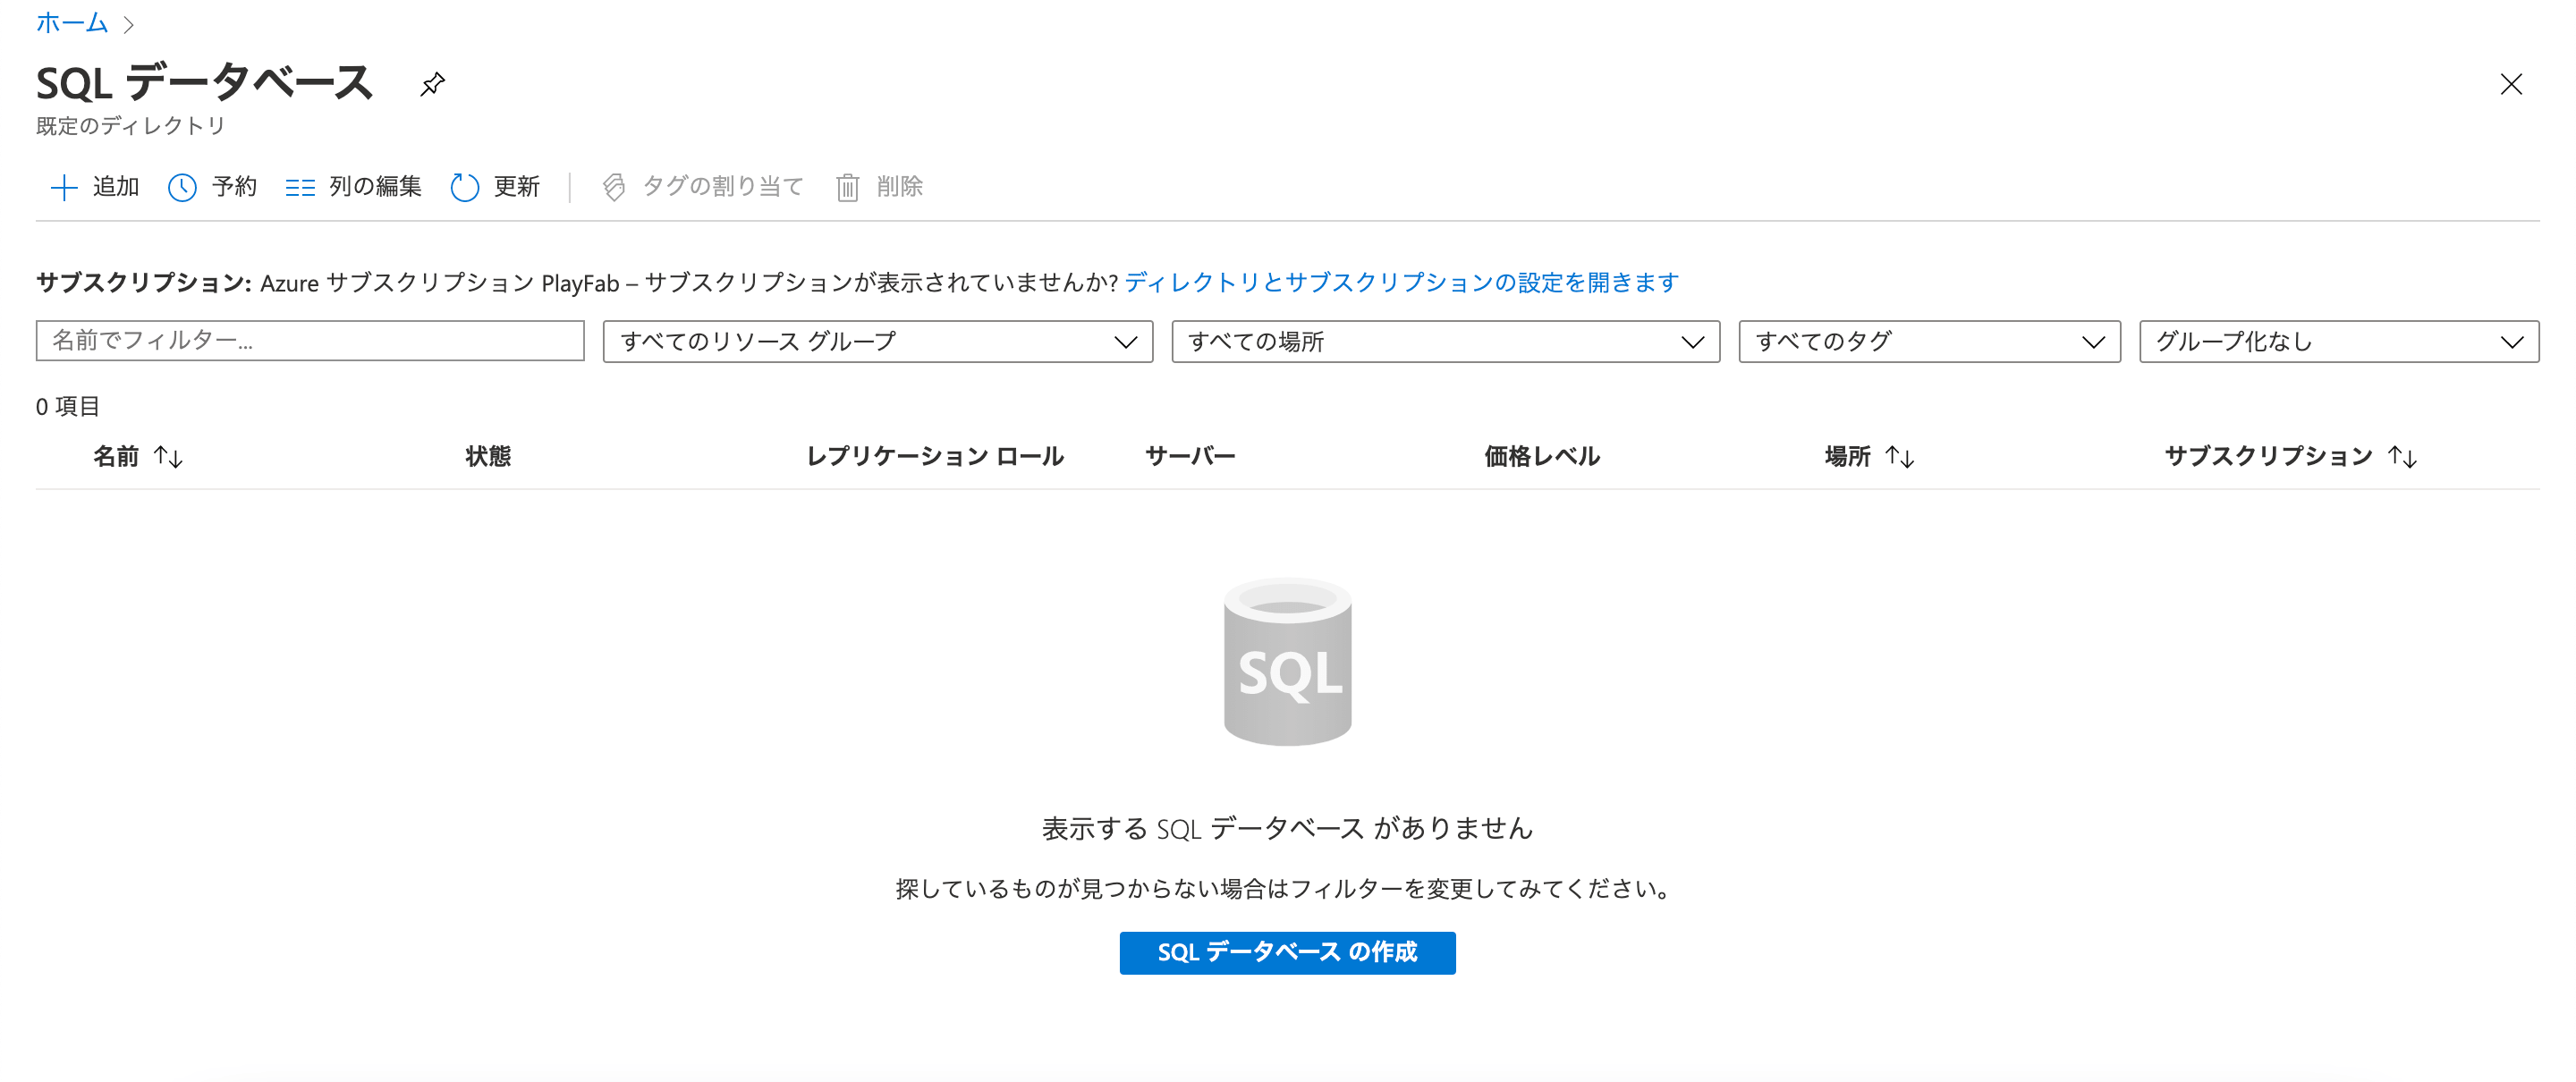
「SQL データベースの作成」ボタンを押します。
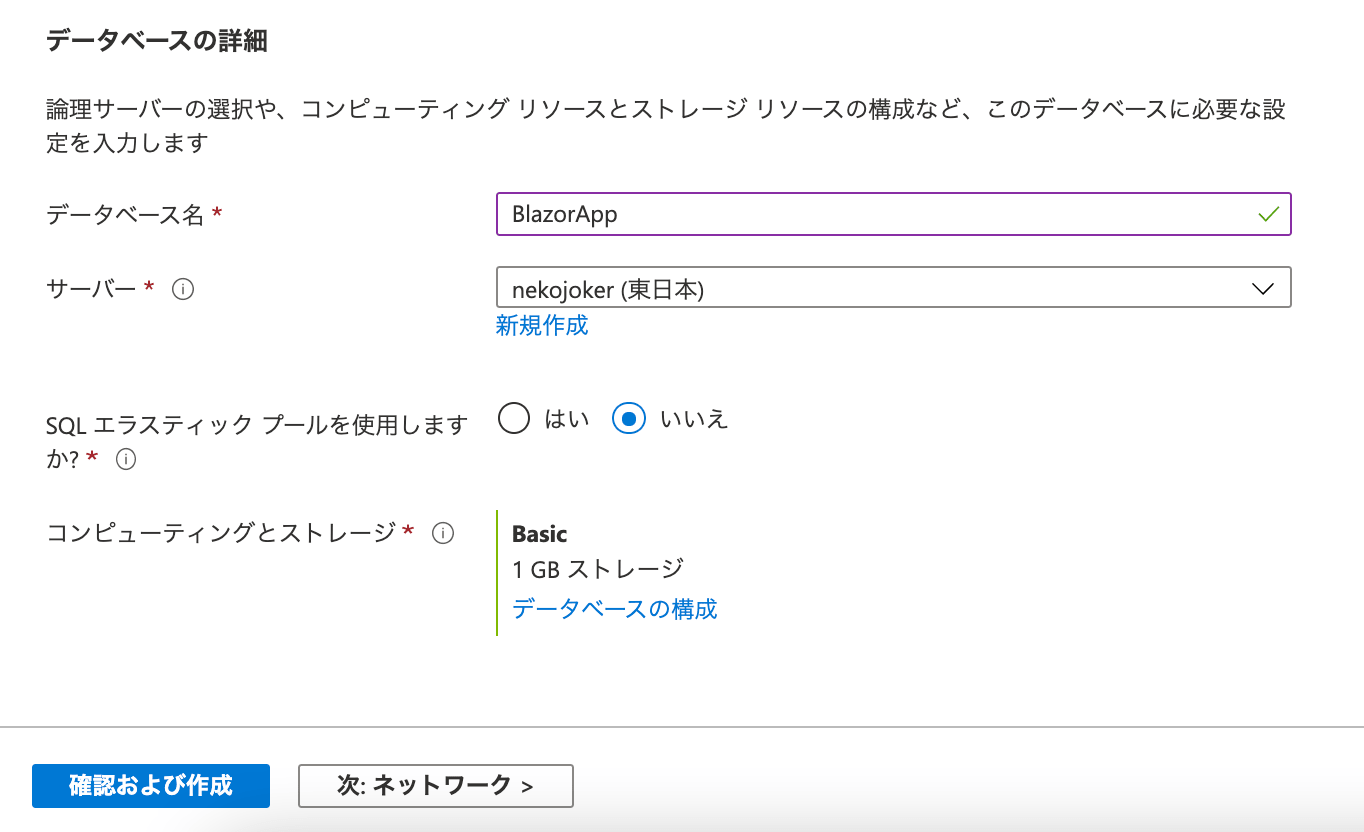
サブスクリプションとリソースグループを選択します。

データベース名とサーバー名は好きな名前で構いません。
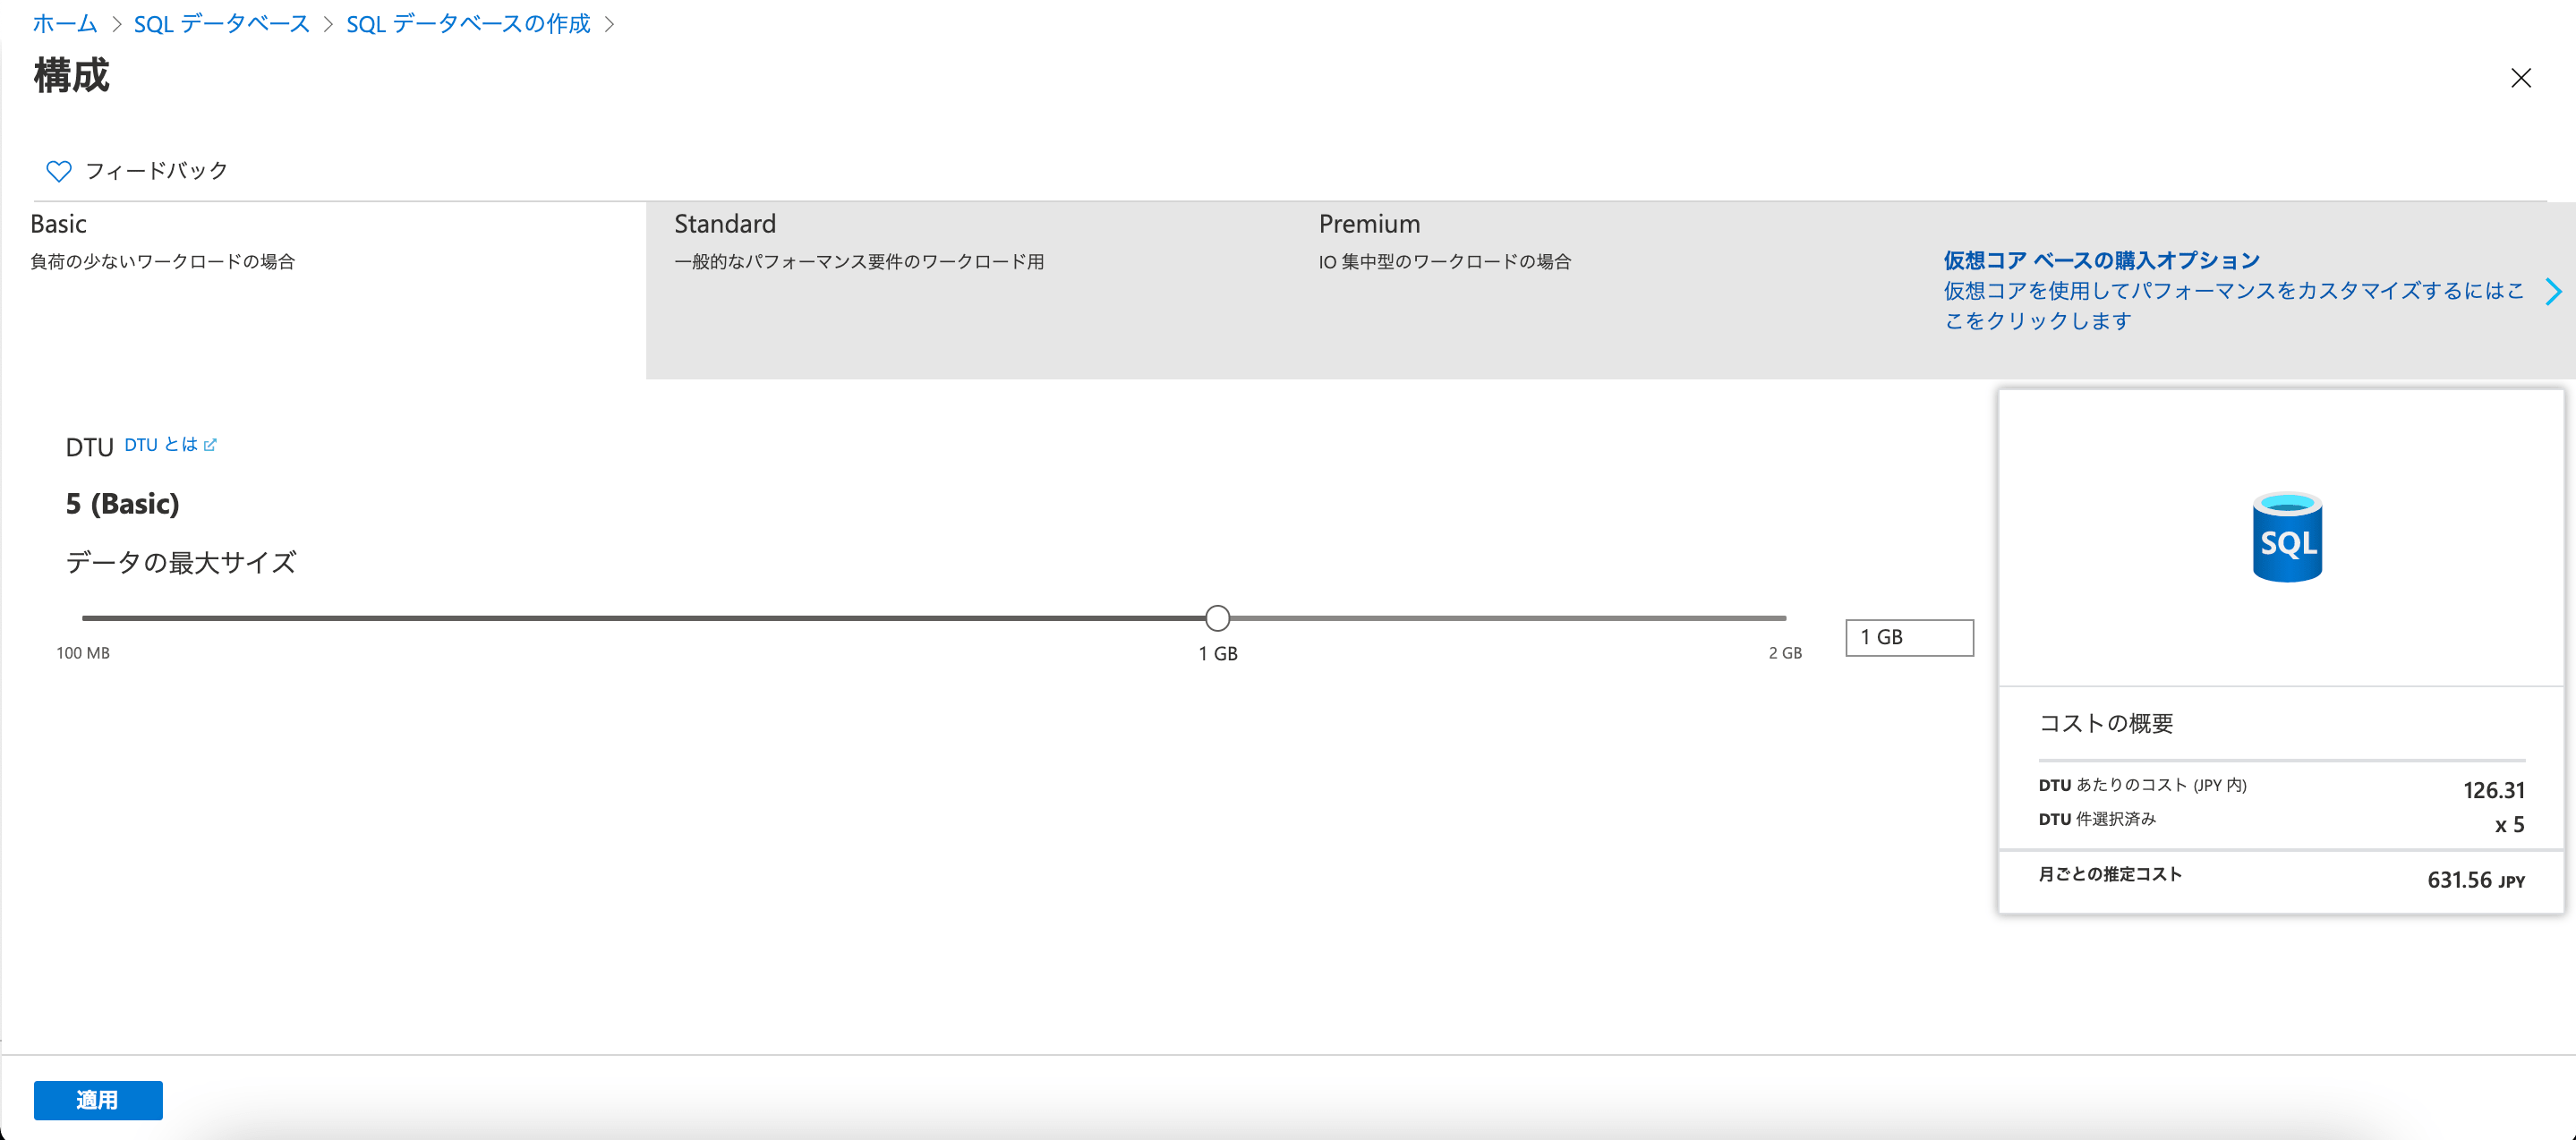
コンピューティングとストレージでは、「Basic 1GB ストレージ」を指定します。
おそらく初期表示ではこの表記になっていないので、すぐ下の「データベースの構成」から内容を変更しましょう。
遷移先の画面で、「Basic」のタブを選択すると、右側に月ごとの推定コスト「631.56 JPY」と表示されます。
つまり、月額 631 円ということですね。
このプランが最低金額で、ここから機能を上げていくと数千円や数万円のプランになっていくわけです。
左下に表示されている「適用」を押せば、設定が反映されます。
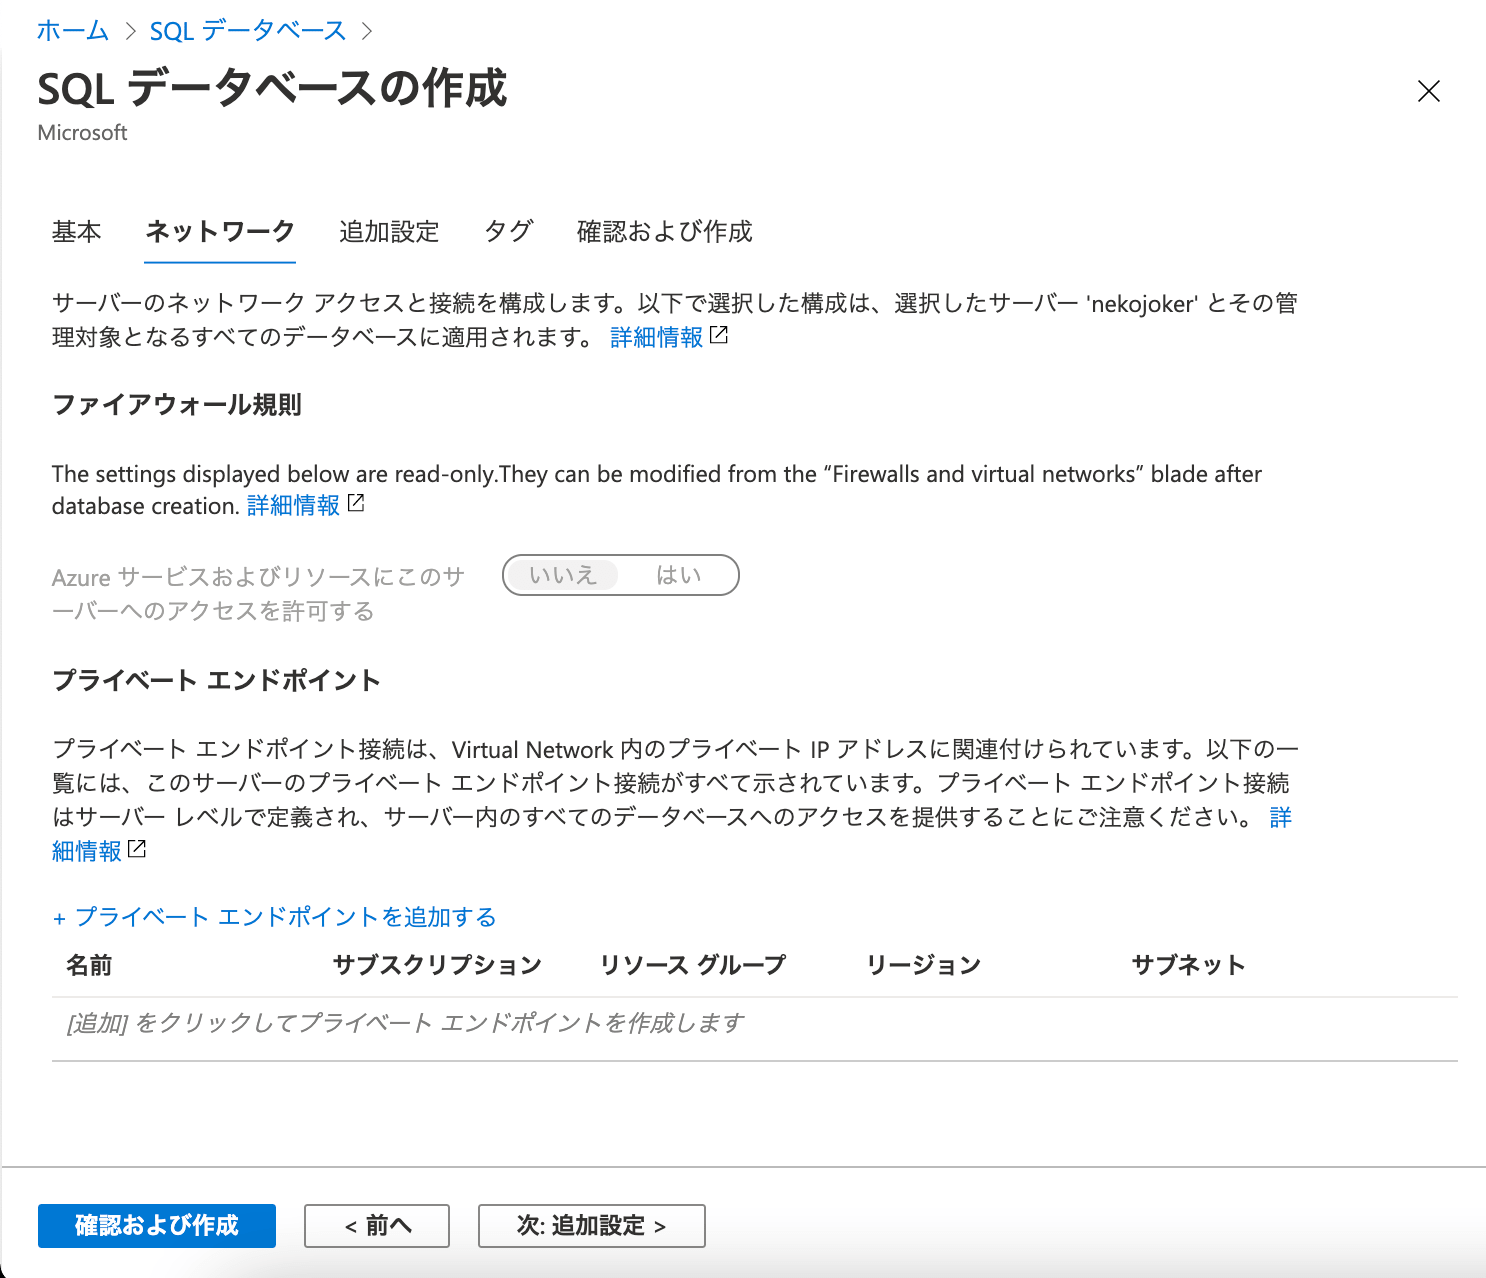
「ネットワーク」のタブにいくと、特に変更できる箇所はないのでこのまま進みましょう。
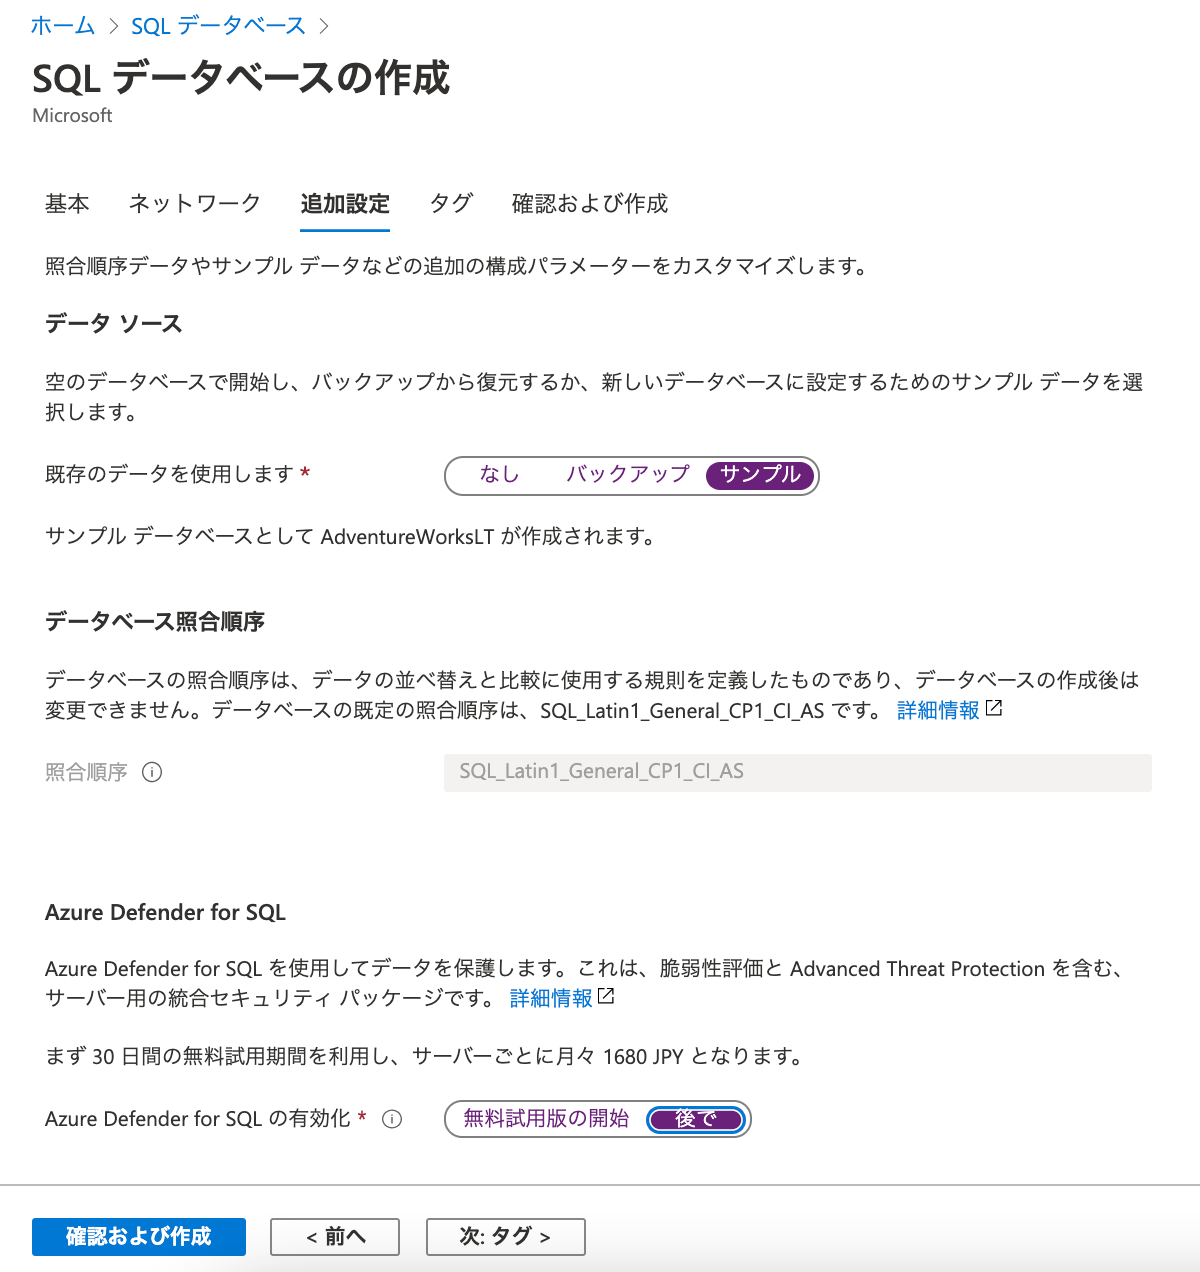
追加設定のデータソースでは、空のデータで開始したり、サンプルのデータを入れた状態で開始できます。
何でも構いませんが、私は「サンプル」を選択しました。
下の方の Azure Defender for SQL については、使うと30日後に課金されてしまうので、「後で」を選択します。
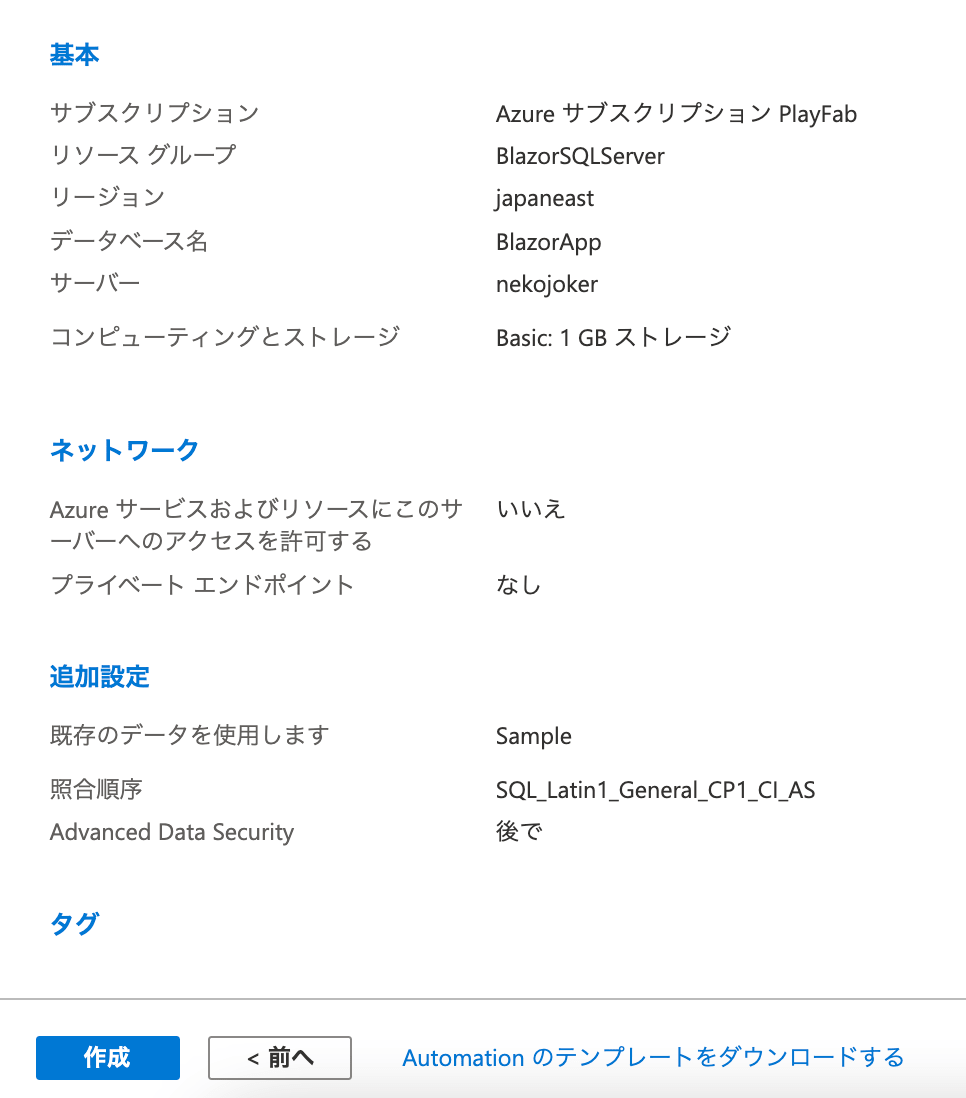
「確認および作成」のタブで、コストが高額になっていないか確認をしましょう。
この確認が漏れてうっかりハイスペックなものを作成してしまうと、高額な請求がきてしまうので注意してください。
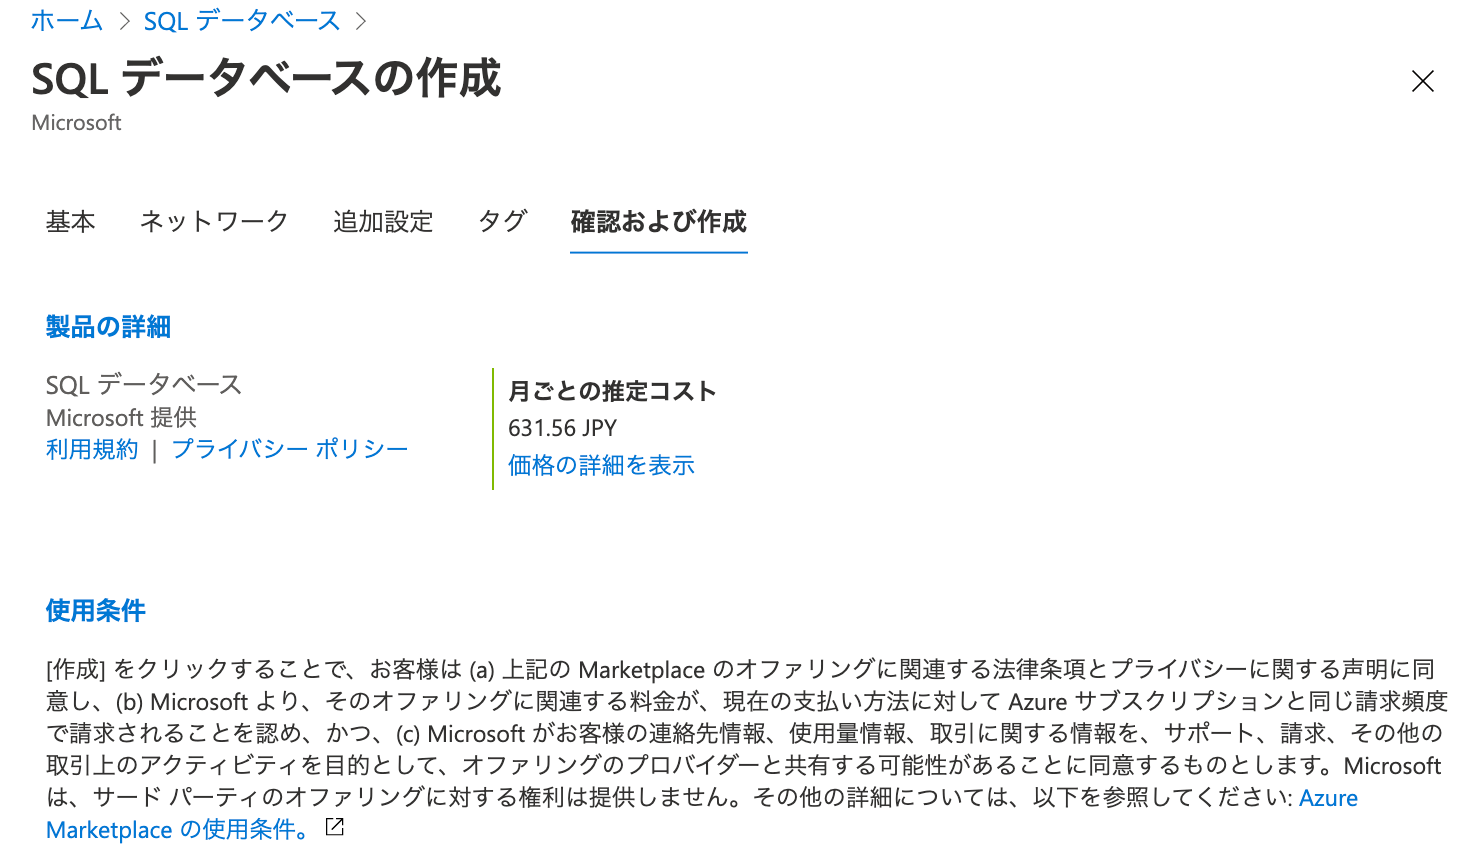
下の方にスクロールすると、細かい設定内容が表示されます。
「Azure Defender for SQL」が「後で」になっていることも、もう一度確認しておきましょう。
問題なければ、「作成」ボタンを押します。
作成には3分くらいかかりました。
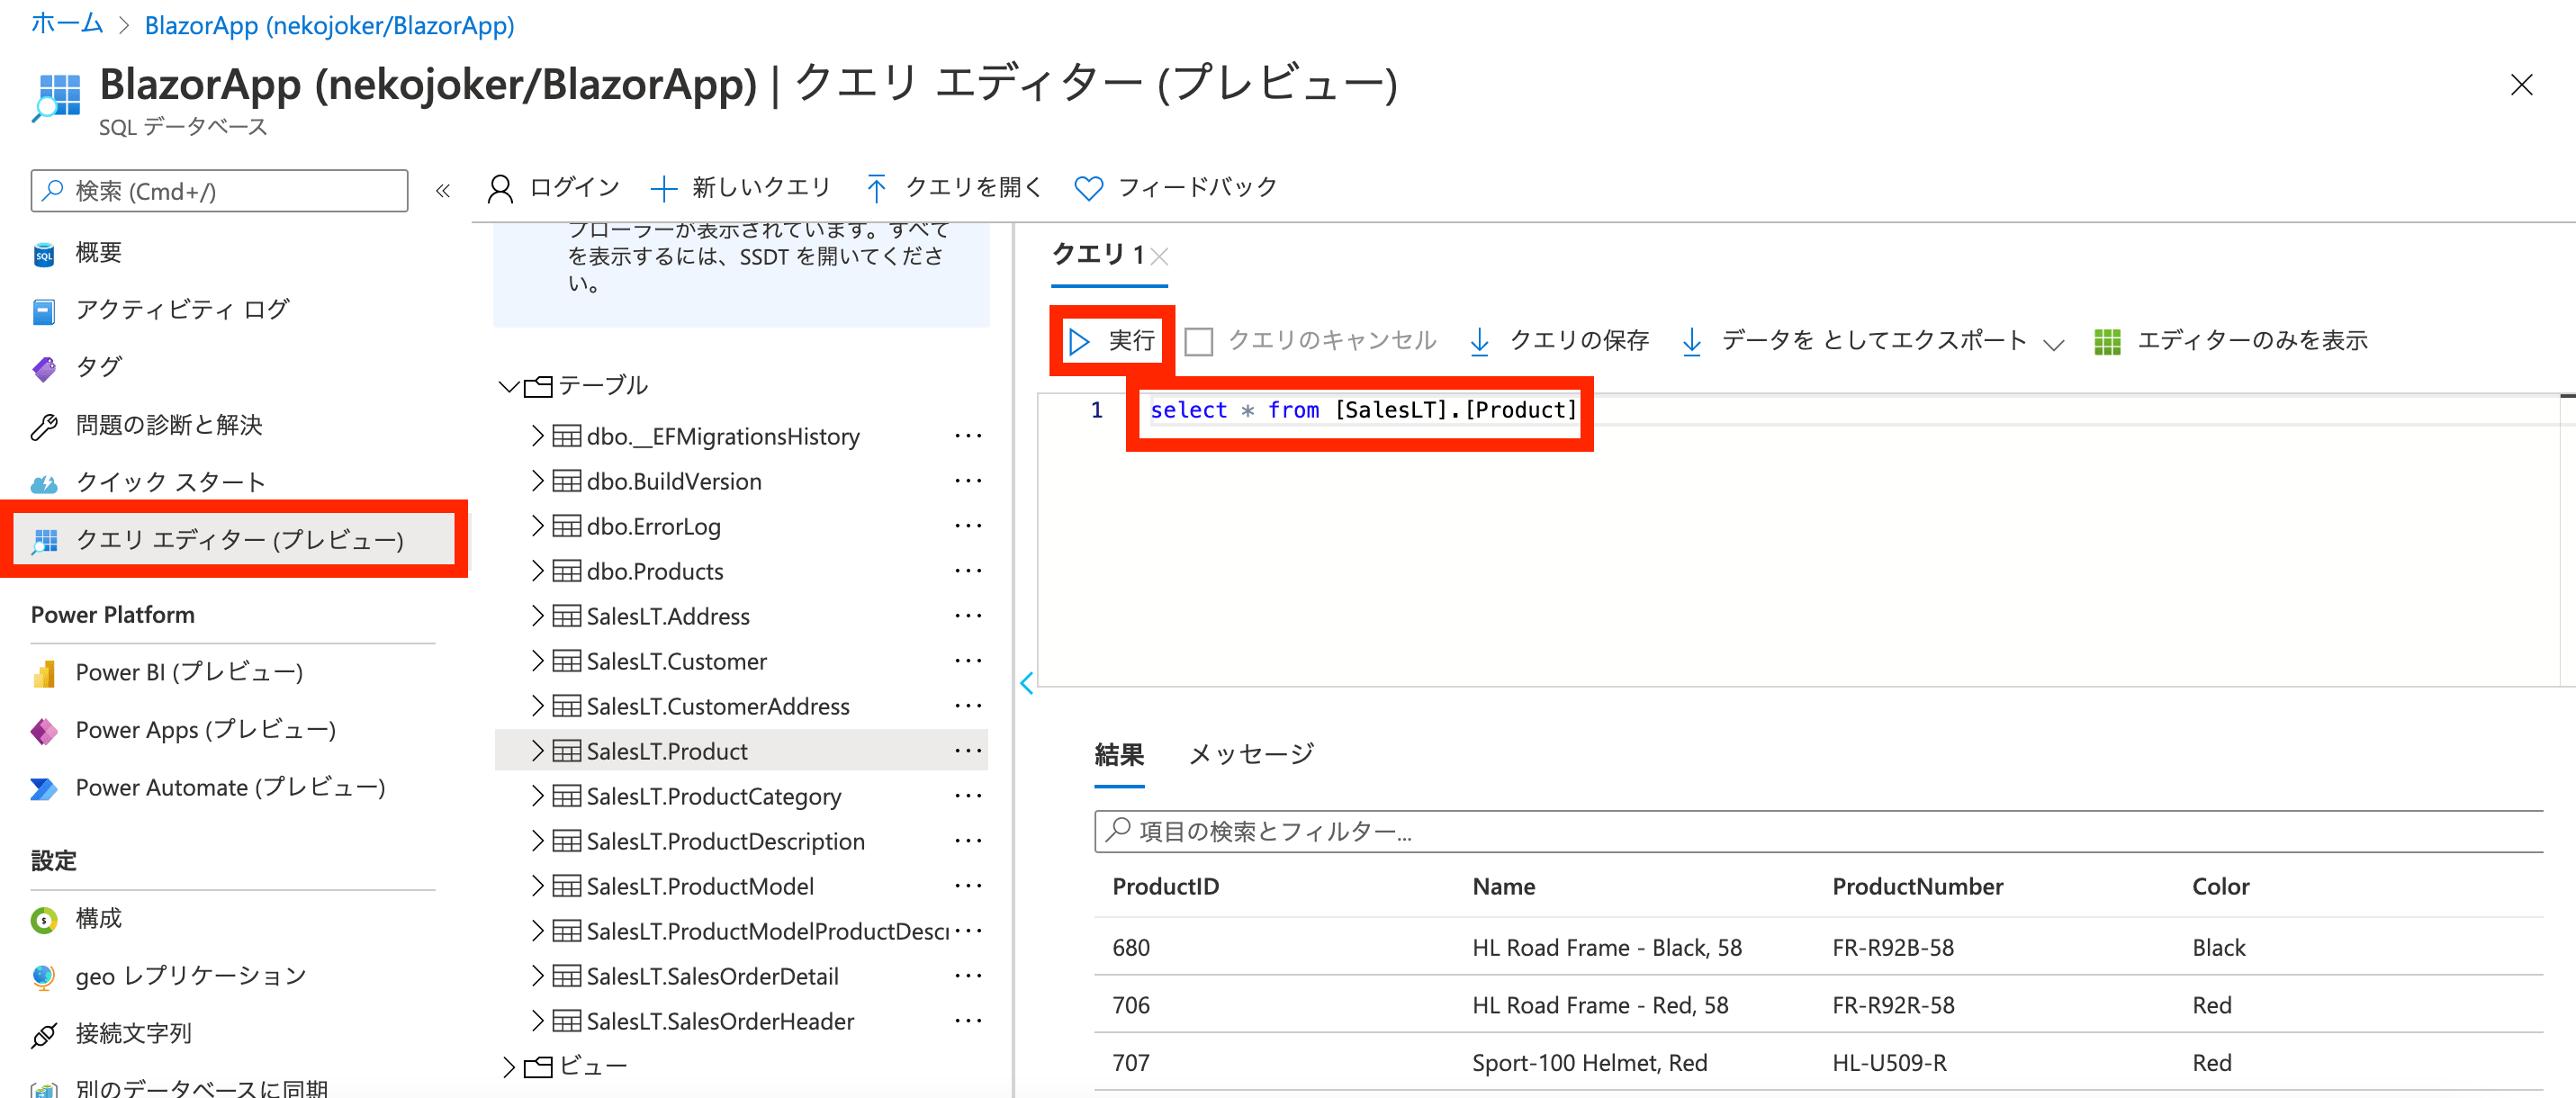
作成が完了したら、サンプルで作成したデータベースを見てみます。
「クエリエディター」を選択すると、クエリを発行できる画面になるので、select * from [SalesLT].[Product]を入力して実行をしてみましょう。
すると、下の方に取得結果が表示されましたね。
最後に、接続文字列が必要になるので、コピーしておきましょう。
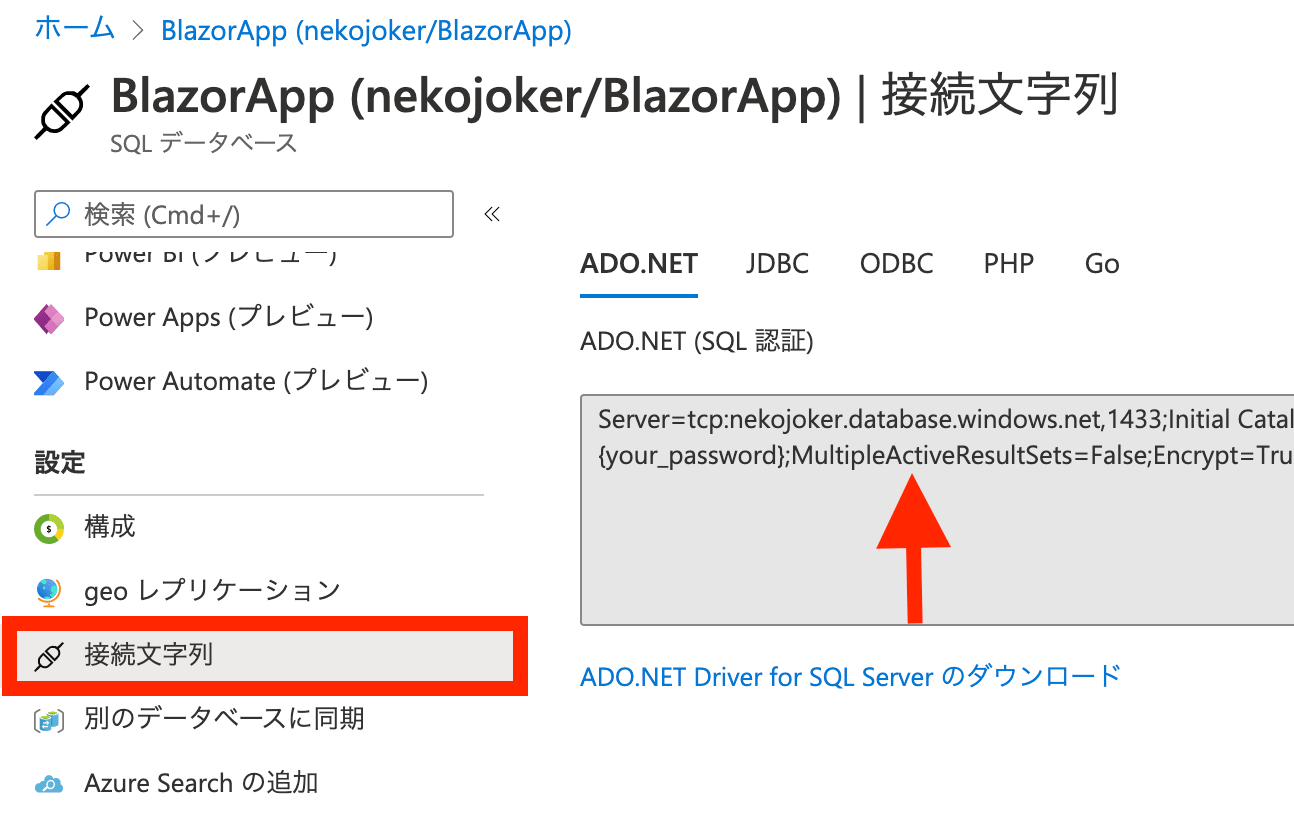
これで、SQL Server 側の準備が整いました。
Entity Framework の準備
Blazor 側の準備を進めていきます。
NuGet パッケージの追加
Entity Framework を使うにあたり、必要なパッケージを追加していきます。
サーバーのプロジェクトを右クリックして、「NuGet パッケージの管理」を選択します。
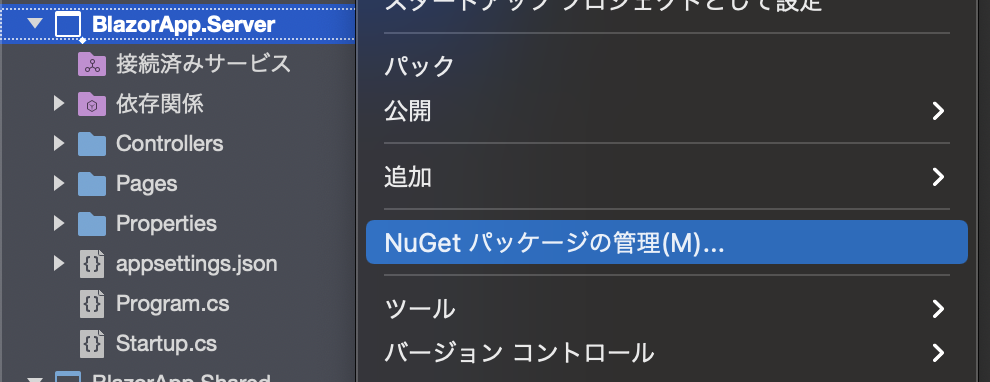
以下のパッケージをインストールしてください。
- Microsoft.EntityFrameworkCore.SqlServer
- Microsoft.EntityFrameworkCore.Design
- Microsoft.EntityFrameworkCore
実行するコマンドによっては Microsoft.EntityFrameworkCore.Tools が必要になるようですが、今回は使わなかったので追加しませんでした。
エンティティクラスの作成
今回は、「商品マスタの一覧を取得して表示する」というシナリオをやってみます。
まずは、データの入れ物となるエンティティクラス「Product」を作成してください。
クライアント側とサーバー側で共通して使用するため、Shared に作成しました。
Column アトリビュートは、エンティティクラスからテーブルを作成できる機能を使うために必要です。
Id と Name は文字列型、Price はint 型としました。
using System;
using System.ComponentModel.DataAnnotations.Schema;

namespace BlazorApp.Shared
{
    public class Product
    {
        [Column(TypeName = "nvarchar(10)")]
        public string Id { get; set; }
        [Column(TypeName = "nvarchar(255)")]
        public string Name { get; set; }
        [Column(TypeName = "int")]
        public int Price { get; set; }
    }
}
データベースアクセスクラスの作成
次に、データベースにアクセスするための DbContext を継承した DataContext を作成します。
このクラスの名前は何でも構いません。
コンストラクタとプロパティ宣言はお作法です。
using System;
using BlazorApp.Shared;
using Microsoft.EntityFrameworkCore;

namespace BlazorApp.Server.Data
{
    public class DataContext : DbContext
    {
        public DataContext(DbContextOptions<DataContext> options)
            : base(options)
        {
        }

        public DbSet<Product> Products { get; set; }
    }
}
接続文字列の設定
SQL Server に接続するには、接続文字列を指定する必要があります。
サーバー側にある appsettings.json のファイルに、ConnectionStrings をキーとした情報を追加してください。
あとでここで設定した情報を参照します。
{
  "AzureAdB2C": {
    "Instance": "https://xxxxxxx.b2clogin.com/",
    "ClientId": "xxxxxxx",
    "Domain": "xxxxxxx.onmicrosoft.com",
    "SignUpSignInPolicyId": "xxxxxxx"
  },
  "ConnectionStrings": {
    "DefaultConnection": "接続文字列をここに指定"
  },
  "Logging": {
    "LogLevel": {
      "Default": "Information",
      "Microsoft": "Warning",
      "Microsoft.Hosting.Lifetime": "Information"
    }
  },
"AllowedHosts": "*"
}
SQL Server の有効化
先ほど設定した接続文字列から、SQL Server を有効化しましょう。
サーバー側の Startup.cs に、UseSqlServer のメソッドを追加してください。
using Microsoft.AspNetCore.Authentication;
using Microsoft.AspNetCore.Builder;
using Microsoft.AspNetCore.Authentication.JwtBearer;
using Microsoft.Identity.Web;
using Microsoft.AspNetCore.HttpsPolicy;
using Microsoft.AspNetCore.Hosting;
using Microsoft.AspNetCore.ResponseCompression;
using Microsoft.Extensions.Configuration;
using Microsoft.Extensions.DependencyInjection;
using Microsoft.Extensions.Hosting;
using System.Linq;
using BlazorApp.Server.Data;
using Microsoft.EntityFrameworkCore;
using BlazorApp.Server.Servicies;

namespace BlazorApp.Server
{
    public class Startup
    {
        public Startup(IConfiguration configuration)
        {
            Configuration = configuration;
        }

        public IConfiguration Configuration { get; }

        // This method gets called by the runtime. Use this method to add services to the container.
        // For more information on how to configure your application, visit https://go.microsoft.com/fwlink/?LinkID=398940
        public void ConfigureServices(IServiceCollection services)
        {
            // ここを追加!!
            services.AddDbContextFactory<DataContext>(options =>
            {
                options.UseSqlServer(Configuration.GetConnectionString("DefaultConnection"));
            });

            services.AddAuthentication(JwtBearerDefaults.AuthenticationScheme)
                .AddMicrosoftIdentityWebApi(Configuration.GetSection("AzureAdB2C"));

            services.AddControllersWithViews();
            services.AddRazorPages();
        }

        // Configure メソッドは今回関係ないので省略
    }
}
エンティティからテーブルを作成する
では実際に、エンティティからテーブルを作成してみましょう。
まずは以下のコマンドを実行して、dotnet ef コマンドをインストールしてください。
dotnet tool install --global dotnet-efインストールできたら、Server プロジェクトの直下で以下のコマンドを実行します。
dotnet ef migrations add Initial以下のログが出れば成功です。
Build started...
Build succeeded.
Done. To undo this action, use 'ef migrations remove'
私の Mac の環境では、コマンドの実行で予期しないエラーが出ることがありました。
その場合でも、もう一度実行すればエラーなく完了したので、念のためメモとして残しておきます。
すると、Migrations フォルダと cs ファイルが自動で作成されています。
これが、テーブル作成用のスクリプトですね。

Initial の中身を見てみましょう。
using Microsoft.EntityFrameworkCore.Migrations;

namespace BlazorApp.Server.Migrations
{
    public partial class Initial : Migration
    {
        protected override void Up(MigrationBuilder migrationBuilder)
        {
            migrationBuilder.CreateTable(
                name: "Products",
                columns: table => new
                {
                    Id = table.Column<string>(type: "nvarchar(10)", nullable: false),
                    Name = table.Column<string>(type: "nvarchar(255)", nullable: true),
                    Price = table.Column<int>(type: "int", nullable: false)
                },
                constraints: table =>
                {
                    table.PrimaryKey("PK_Products", x => x.Id);
                });
        }

        protected override void Down(MigrationBuilder migrationBuilder)
        {
            migrationBuilder.DropTable(
                name: "Products");
        }
    }
}
Up メソッドで、テーブル作成が実行されています。
テーブル名はエンティティクラスの複数形になる仕様です。
Id が自動でプライマリーキーに設定されていることもわかりますね。
Down メソッドは、この操作を取り消すときに実行されるメソッドです。

という場合も取消ができるのはありがたいですね。
スクリプトが作成できたので、このスクリプトをもとに SQL Server を更新します。
以下のコマンドを実行してください。
dotnet ef database update先ほどと同じように、Done がログとして出れば成功です。
Build started...
Build succeeded.
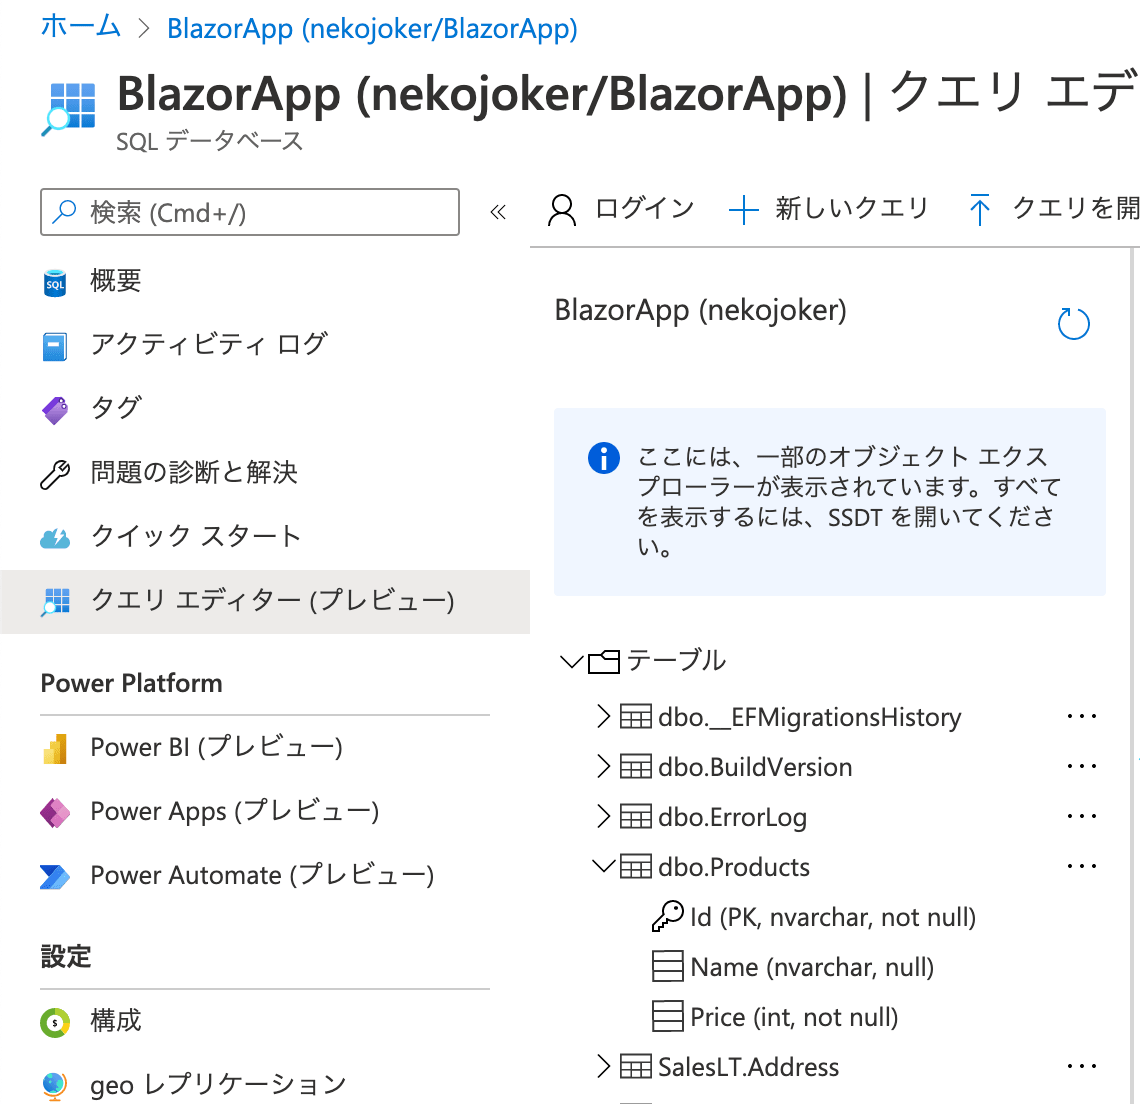
Done.テーブルが作成されたのか、確かめてみましょう。
テーブルの一覧を見ると、「dbo.Products」のテーブルが作成されていることが確認できました。
テーブルにサンプルデータを投入する
ここまではテーブルを作成しただけで、データは何も入っていません。
そこで、C# 側でサンプルデータを作成して、DB 更新する手順も解説します。
DataContext のクラスに OnModelCreating を追加して、適当なサンプルデータを作成しましょう。
とりあえず3レコード作成するように指定しました。
using System;
using BlazorApp.Shared;
using Microsoft.EntityFrameworkCore;

namespace BlazorApp.Server.Data
{
    public class DataContext : DbContext
    {
        public DataContext(DbContextOptions<DataContext> options)
            : base(options)
        {
        }

        public DbSet<Product> Products { get; set; }

        protected override void OnModelCreating(ModelBuilder modelBuilder)
        {
            modelBuilder.Entity<Product>().HasData(
                new Product { Id = "0000000001", Name = "Book", Price = 1000 },
                new Product { Id = "0000000002", Name = "Pen", Price = 500 },
                new Product { Id = "0000000003", Name = "Laptop", Price = 30000 }
            );
        }
    }
}
メソッドを追加したら、以下のコマンドを実行してください。
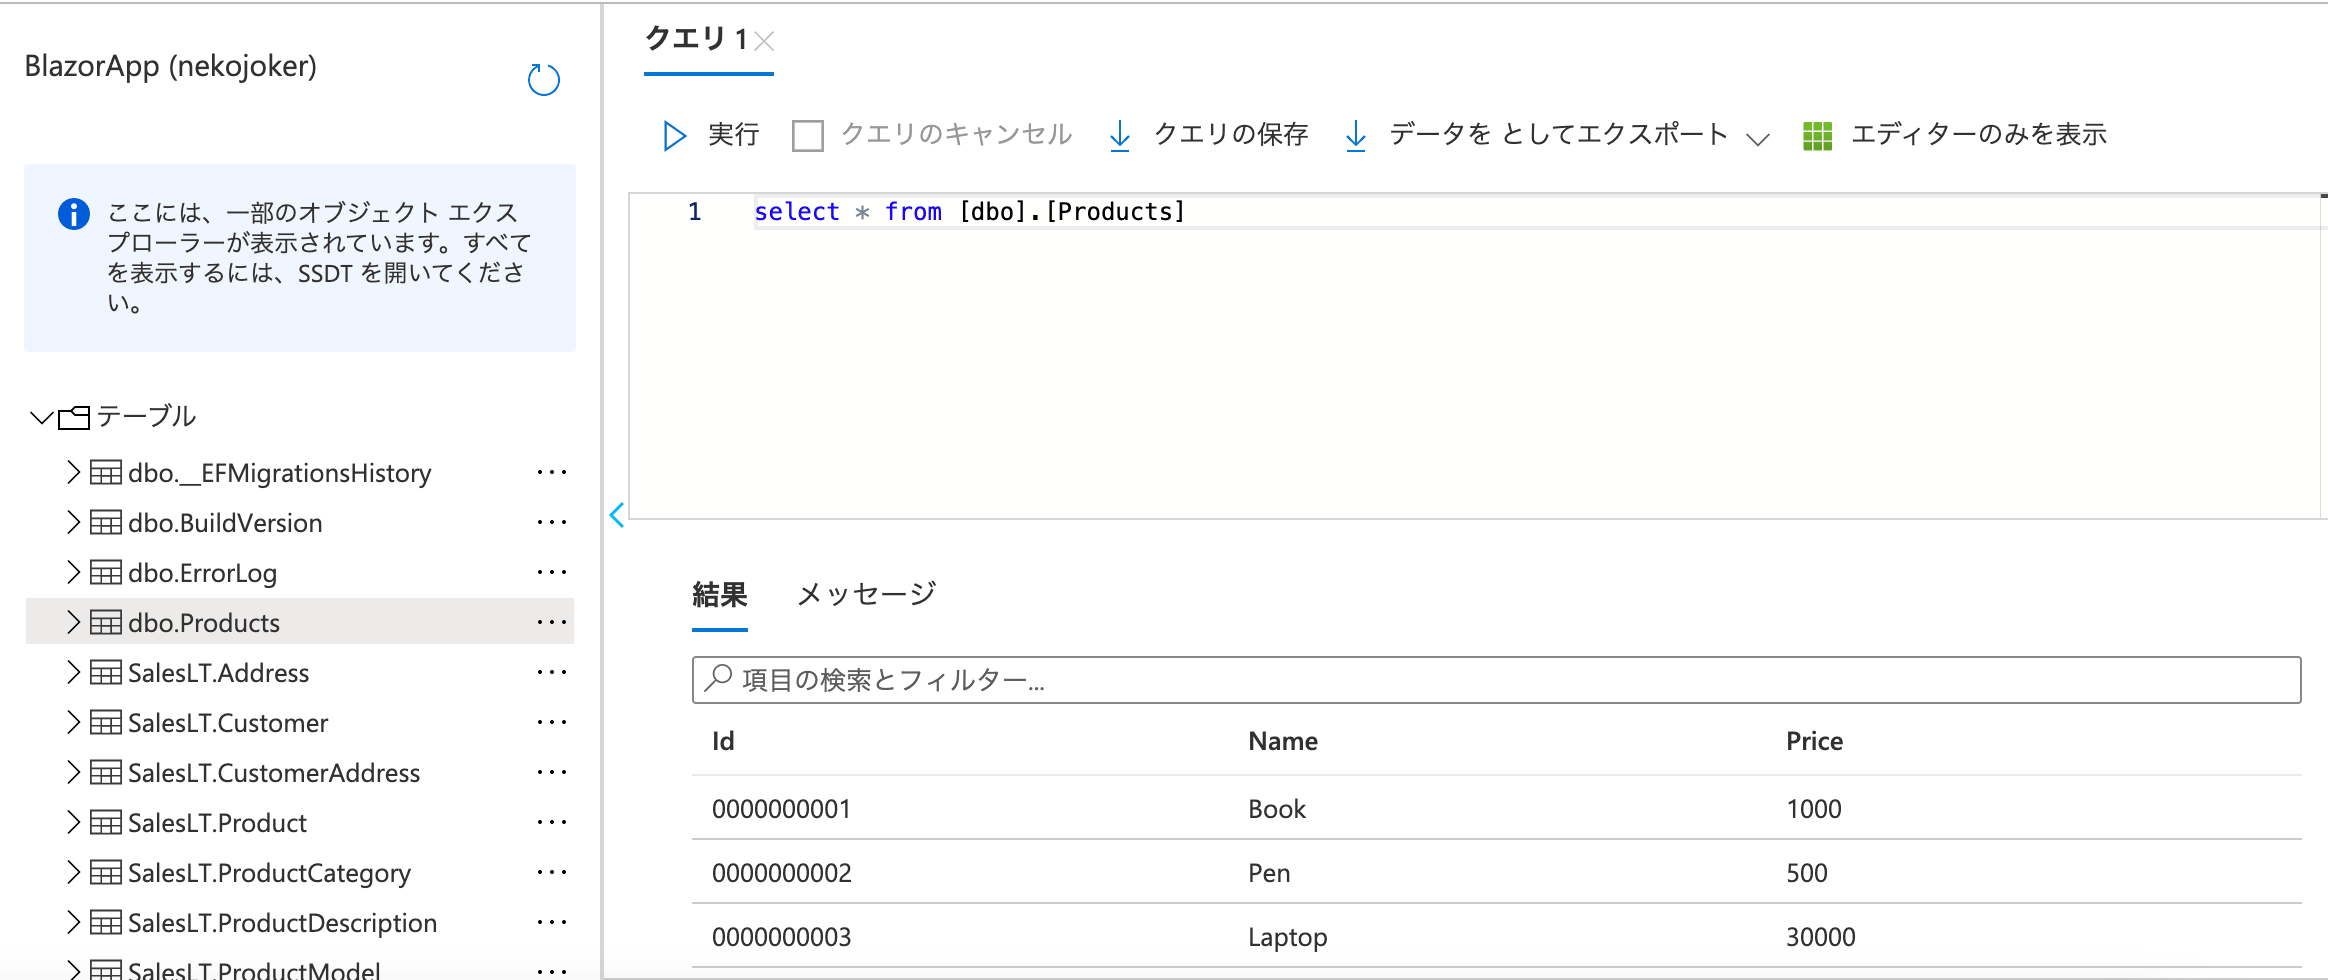
dotnet ef migrations add Seeding実際にデータができたのか確認してみましょう。
ポータルでクエリを実行してみると、たしかに3レコード作成されていることが確認できました。

データベースにアクセスする
いろいろと準備が整ったので、データベースにアクセスして商品の一覧を取得してみましょう。
ProductService 作成(サーバー側)
サーバー側に Services フォルダを作成し、ProductController から呼び出す用の ProductService を作成します。
using System;
using System.Collections.Generic;
using System.Threading.Tasks;
using BlazorApp.Server.Data;
using BlazorApp.Shared;
using Microsoft.EntityFrameworkCore;

namespace BlazorApp.Server.Servicies
{
    public interface IProductService
    {
        Task<List<Product>> GetAllProducts();
    }

    public class ProductService : IProductService
    {
        private readonly DataContext _context;

        public ProductService(IDbContextFactory<DataContext> context)
        {
            _context = context.CreateDbContext();
        }

        public async Task<List<Product>> GetAllProducts()
        {
            using (_context)
            {
                return await _context.Products.ToListAsync();
            }
        }
    }
}
GetAllProduct が商品の一覧を取得するメソッドです。
DataContext の ToListAsync を呼び出すことで、DB に登録されているデータの一覧を取得できます。
また、DataContext が継承している DbContext はスレッド セーフではなく、同時に使用するように設計されていません。
したがって、IDbContextFactory を経由して都度インスタンスを生成し、using を使って都度破棄をしています。
ProductController の作成
API として使うコントローラークラスを作成します。
先ほど作成した ProductService を経由して、API の実行をする仕組みとしています。
using BlazorApp.Server.Servicies;
using BlazorApp.Shared;
using Microsoft.AspNetCore.Http;
using Microsoft.AspNetCore.Mvc;
using System;
using System.Collections.Generic;
using System.Linq;
using System.Threading.Tasks;

namespace BlazorApp.Server.Controllers
{
    [Route("api/[controller]")]
    [ApiController]
    public class ProductController : ControllerBase
    {
        private readonly IProductService _productService;

        public ProductController(IProductService productService)
        {
            _productService = productService;
        }

        [HttpGet]
        public async Task<ActionResult<List<Product>>> GetAllProducts()
        {
            return Ok(await _productService.GetAllProducts());
        }
    }
}
ProductService 作成(クライアント側)
各画面から直接 API を呼び出してもいいのですが、クライアント側でもサービスクラスを作ってラップしています。
using System;
using System.Collections.Generic;
using System.Linq;
using System.Net.Http;
using System.Net.Http.Json;
using System.Threading.Tasks;
using BlazorApp.Shared;

namespace BlazorApp.Client.Services
{
    public interface IProductService
    {
        Task<List<Product>> GetAllProducts();
    }

    public class ProductService : IProductService
    {
        private readonly HttpClient _http;

        public ProductService(HttpClient http)
        {
            _http = http;
        }

        public async Task<List<Product>> GetAllProducts()
        {
            return await _http.GetFromJsonAsync<List<Product>>("api/Product");
        }
    }
}
Scope の追加
サービスクラスのインスタンスを毎回生成しなくて済むように、AddScope で追加してあげます。
今回はクライアント側とサーバー側でサービスクラスを用意したので、両方で追加しました。
using System;
using System.Net.Http;
using System.Collections.Generic;
using System.Threading.Tasks;
using System.Text;
using Microsoft.AspNetCore.Components.WebAssembly.Authentication;
using Microsoft.AspNetCore.Components.WebAssembly.Hosting;
using Microsoft.Extensions.Configuration;
using Microsoft.Extensions.DependencyInjection;
using Microsoft.Extensions.Logging;
using BlazorApp.Client.Services;

namespace BlazorApp.Client
{
    public class Program
    {
        public static async Task Main(string[] args)
        {
            var builder = WebAssemblyHostBuilder.CreateDefault(args);
            builder.RootComponents.Add<App>("#app");

            builder.Services.AddHttpClient("BlazorApp.ServerAPI", client => client.BaseAddress = new Uri(builder.HostEnvironment.BaseAddress))
                .AddHttpMessageHandler<BaseAddressAuthorizationMessageHandler>();

            // Supply HttpClient instances that include access tokens when making requests to the server project
            builder.Services.AddScoped(sp => sp.GetRequiredService<IHttpClientFactory>().CreateClient("BlazorApp.ServerAPI"));

            // ここを追加!!
            builder.Services.AddScoped<IProductService, ProductService>();

            builder.Services.AddMsalAuthentication(options =>
            {
                builder.Configuration.Bind("AzureAdB2C", options.ProviderOptions.Authentication);
                options.ProviderOptions.DefaultAccessTokenScopes.Add("https://nekojoker.onmicrosoft.com/xxxxxx/API.Access");
            });

            await builder.Build().RunAsync();
        }
    }
}
using Microsoft.AspNetCore.Authentication;
using Microsoft.AspNetCore.Builder;
using Microsoft.AspNetCore.Authentication.JwtBearer;
using Microsoft.Identity.Web;
using Microsoft.AspNetCore.HttpsPolicy;
using Microsoft.AspNetCore.Hosting;
using Microsoft.AspNetCore.ResponseCompression;
using Microsoft.Extensions.Configuration;
using Microsoft.Extensions.DependencyInjection;
using Microsoft.Extensions.Hosting;
using System.Linq;
using BlazorApp.Server.Data;
using Microsoft.EntityFrameworkCore;
using BlazorApp.Server.Servicies;

namespace BlazorApp.Server
{
    public class Startup
    {
        public Startup(IConfiguration configuration)
        {
            Configuration = configuration;
        }

        public IConfiguration Configuration { get; }

        // This method gets called by the runtime. Use this method to add services to the container.
        // For more information on how to configure your application, visit https://go.microsoft.com/fwlink/?LinkID=398940
        public void ConfigureServices(IServiceCollection services)
        {
            services.AddDbContextFactory<DataContext>(options =>
            {
                options.UseSqlServer(Configuration.GetConnectionString("DefaultConnection"));
            });

            services.AddAuthentication(JwtBearerDefaults.AuthenticationScheme)
                .AddMicrosoftIdentityWebApi(Configuration.GetSection("AzureAdB2C"));

            // ここを追加!!
            services.AddScoped<IProductService, ProductService>();

            services.AddControllersWithViews();
            services.AddRazorPages();
        }

        // Configure メソッドは今回関係ないので省略
    }
}
一覧表示画面の作成
取得するロジック部分ができたので、取得した結果を表示する画面を作成しましょう。
ProductList という名前のページを作成しました。
動きとしては単純で、DB から取得したデータをテーブル形式で一覧表示するというものです。
@page "/productlist"
@using BlazorApp.Client.Services
@using BlazorApp.Shared;
@inject IProductService ProductService

@if (products == null)
{
    <p>Loading...</p>
}
else
{
    <table class="table">
        <thead>
            <tr>
                <td>ID</td>
                <td>名称</td>
                <td>価格</td>
            </tr>
        </thead>
        <tbody>
            @foreach (var p in products)
            {
                <tr>
                    <td>@p.Id</td>
                    <td>@p.Name</td>
                    <td>@p.Price</td>
                </tr>
            }
        </tbody>
    </table>
}

@code{
    private List<Product> products;

    protected override async Task OnInitializedAsync()
    {
        products = await ProductService.GetAllProducts();
    }
}
追加した画面は、メニューに追加してあげましょう。
<div class="top-row pl-4 navbar navbar-dark">
    <a class="navbar-brand" href="">BlazorApp</a>
    <button class="navbar-toggler" @onclick="ToggleNavMenu">
        <span class="navbar-toggler-icon"></span>
    </button>
</div>

<div class="@NavMenuCssClass" @onclick="ToggleNavMenu">
    <ul class="nav flex-column">
        <li class="nav-item px-3">
            <NavLink class="nav-link" href="" Match="NavLinkMatch.All">
                <span class="oi oi-home" aria-hidden="true"></span> Home
            </NavLink>
        </li>
        <li class="nav-item px-3">
            <NavLink class="nav-link" href="counter">
                <span class="oi oi-plus" aria-hidden="true"></span> Counter
            </NavLink>
        </li>
        <li class="nav-item px-3">
            <NavLink class="nav-link" href="fetchdata">
                <span class="oi oi-list-rich" aria-hidden="true"></span> Fetch data
            </NavLink>
        </li>
        <li class="nav-item px-3">
            <NavLink class="nav-link" href="productlist">
                <span class="oi oi-list-rich" aria-hidden="true"></span> Product List
            </NavLink>
        </li>
    </ul>
</div>

@code {
    private bool collapseNavMenu = true;

    private string NavMenuCssClass => collapseNavMenu ? "collapse" : null;

    private void ToggleNavMenu()
    {
        collapseNavMenu = !collapseNavMenu;
    }
}
動作確認
長かったですが、ようやく準備が整ったのでデバッグ実行してみましょう。
認証機能を実装している場合は、現状ではログインが必要なので、ログインしてから Product List のページを参照してください。
無事に、SQL Server のデータを一覧表示することができました。

最後に
Entity Framework を使って SQL Server で DB 管理する方法について解説しました。
私はエラーで結構ハマりましたが、この記事の手順の通り実装することで、エラーなく導入できると思います。
この記事をきっかけに、Entity Framework をスムーズに統合できる人が増えれば幸いです。
入門編から EC サイトを作る応用編まで、Blazor の本を3冊執筆しました。
私が1年以上かけて学習した内容をすべて詰め込んでいるので、さらにステップアップしたい方はぜひご覧ください。